Showing posts with label Gypsy. Show all posts

Friday, July 6, 2012

Vintage Christmas

I haven't posted in awhile due to the end of the school year activities and trip to the cottage.  It's been an amazingly hot week but I did find a bit of time to sneak away to my craft room.

I'm playing along with Jingle Belles Vintage Christmas challenge this week and here is my creation:

Papers - Graphic 45
Cricut - Joys of the Season for poinsettia 
Cricut - Accent Essentials for gold frame (welded with Gypsy)
Gold stickles, beads and gem embellishments
Vintage Photo distressed ink for edges and sentiment

I just love the Graphic 45 papers for this card.  The background paper is the classical "Night Before Christmas" story and such lovely images of old time Christmas.

Thanks for dropping by and hope you are enjoying the summer weather!


Challenge - Jingle Belles Have Yourself a Vintage Christmas JB-12-14

Sunday, June 10, 2012

Butterfly Girl

Happy Sunday everyone!  I hope you have wonderful plans to relax today.  I'm able to do as I please as unfortunately all of the members of my family are working today.  I was up bright and early at 4:55 am and so I had plenty of time to enjoy my coffee and make this card.


I had started some of it yesterday by stamping the middle part as I wanted to experiment with watercolouring using distressed ink.  I watched a few videos on Youtube but unfortunately I didn't bookmark them so I can't share the link with you.  It's a very simple technique that simply involves applying distress ink to an acrylic block then either use a waterfillable brush or paintbrush dipped in water.  I did the latter as I hand everything on hand.

Then today my inspiration for the Butterfly Girl was a stamp from Sam Poole at Creative Studios.  She has a wonderful set called Artful ladies and Sam has produced so many amazing cards.  Here's a link to the stamps and from there you can browse her blog.   I made my butterfly girl with the Cricut Expression using the Rock Princess cartridge.  I altered the image using the Gypsy to do away with the microphone and have two symetrical arms.

I then chose some soft papers from the Heatwarming Vintage Collection and Webster's pages.  Finally added a piece of ric rac and then a flower that I had recently made out of ribbon.

Enjoy your day and I would love to hear your comments!

Tuesday, May 8, 2012

Would you join me for a cup of tea?

I had some free time this afternoon so I decided to play in my craftroom.  I was inspired to make a card while thinking about some dear friends and after looking at a number of different blogs and challenges.

Here is what I created and happily it meets the requirements of three challenges. All of the cuts were made using my Cricut.   I needed to line up my paper exactly on the Cricut mat to achieve a "Royal Doulton" fine china pattern but I think I succeeded.

Card Recipe:
Papers - Kraft cardstock for base, Fancy Pants for pink base,
K&Company Blue pattern, Lost & Found for teacup, Recollections for solids
Cricut - Elegant Edges for all cuts except teacup which was A Child's Year
Pearls and gold Stickles for embellishments
Ink - Distress Broken China


For the sketch design - I Spy Sketches


Colours including having a rose The Shabby Tea Room 


And lastly, using Kraft cardstock for the Kraft Journal Make it Monday challenge with the theme being "Card for Her".

Hope you'll join me and have a cup of tea with your dear friends soon!


Merry Monday

It's a rainy day here and I'm still in the mood to create a Christmas card.  It's not always easy but I know that I will feel much better in September if I can keep making a few each month.

This week's sketch on Merry Monday looked like fun so I joined in.


I decided to use up mainly Christmas cardstock scraps as my folder is bulging and there are still some good pieces available.  I designed all the cuts on my Gypsy and then all I needed to do was ink, add a grommet and ribbon and glue down the shapes.   I modified the rounded rectangle a bit but that's part of the creativity and interpretation of the sketch!


Card Recipe
Papers - DCWV and Recollections
Cricut - Accent Essentials card base, Elegant Edges for green frame,
Ribbons & Rosettes for border with snowman and Winter Frolic for ornament
Ink - Antique Linen, Peeled Paint distressed for oval and Versafine for sentiment
Holly Leaves - Ranger Emerald
Ribbon - plaid from stash, stickles coloured with red marker, grommet and
acetate for oval frame


Thanks for looking and have a great day!

Friday, April 27, 2012

Mojo Monday - A first for me!

I decided to join in on the Mojo Monday sketch after a great read of NanaDonna's blog.  She's a regular participant on the RAQ challenge on the Cricut forum that I have been following.

Here is the sketch for this week Mojo Monday # 238

I always find it a challenge to align the squares perfectly so I decided to take an image from Cricut Ornamental Iron 2 cartridge and weld the 12 squares together using my Gypsy.  It was so easy and within a few minutes, I was cutting out the design.  


For the first card, I made more of a mosaic/stained glass effect with the base paper that I chose.  The rosette was created from the Ribbons and Rosettes cartridge and the leaves are Accent essentials (inked with Peeled Paint distress in).  I added pearls and a few layers of ribbon.

For this second card, I decided on a black and white palette and flipped the image.
The frame was inked with Versamark and embossed with clear powder to give it a shiny look.  I made a few pearl stick pins, added a feather and created the small tag.  The "thanks" flower was from the Cricut Sweet Treats cartridge.


I always need "thank you" cards on hand to show my appreciation to my dear friends for their wonderful hospitality and generosity. 

Enjoy your weekend!


Wednesday, June 8, 2011

Fabulous Fifty

A dear family member turned 50 on Monday...should I say who it was?  It was my dear sister and I made this special card just to celebrate her!


The card was made to look like a storefront window that I designed using the Gypsy and welding the rectangles.  I placed a piece of acetate over the women's items secured with heart brads and then placed the sentiment "Be Fabulous" on pop-up dots.  All cuts were done using the Cricut cartridge - Gypsy Wanderings but I used two different types of paper.  I added sequin ribbon to the dress, a flower for the shoe and a shimmering brad for the hat.  I used the Cuttlebug polka dot folder for the white background.

I also made her a small wallet folder to include some money in the envelope.  Hope she has a wonderful day at a spa. 
The technique  for making the folder was from Splitcoaststampers but you can view a great video here Paper Boutique Blog - Business Card Folder

Sunday, April 24, 2011

Easter Parade - Final Cards

Happy Easter!  Hope you're enjoying this time with your family and friends. 

First off, I'm showing a couple of mailboxes that I decorated from my two children.  They're too old for an Easter hunt but still enjoy receiving some candy and chocolate.  The mailboxes were purchased at Walmart and I simply decorated them with paper, personalized them and made a few cut-outs for the flag.


Here is the card that I made for my dear husband.  It is a fold card that stands up on its own.  I simply designed the rabbit using the Gypsy and welded a rectangle for the base. I used some "fun flock" in light green for the accent, cut the grass from A Child's Year cartridge and tied a ribbon at the neck.


The next shape card was for my parents and I simply welded the shape together.  I cut out the relevant layers in DCWV glitter and shimmer paper. I printed the Happy Easter on vellum and attached it with a purple button brad.  


The next card was given to my dear daughter.  I had tried the Smooch Spritz for the background layer, cut the chickadee and musical notes from a Stretch Your Imagination cartridge and added some ribbon for embellishment.  The card base was an ivory embossed paper from a stock that I had on hand.


Finally, here is the card for my son.  I used the Stretch your Imagination cartridge for the rabbit and egg shapes using different colours of paper and outlining the entire shape in a silver DCWV shimmer paper. 


I also suggest that you l look at the previous post and let me know which is your favorite Easter card.   


Monday, February 21, 2011

Cricut Community Board

This week's shout-out is to the Cricut Community board and specifically to the Gypsy Tech Qs and As section.    It can save you so much time and you can learn so many helpful tips and techniques.   


So if you have a Gypsy, I highly recommend this site.

The Gypsy

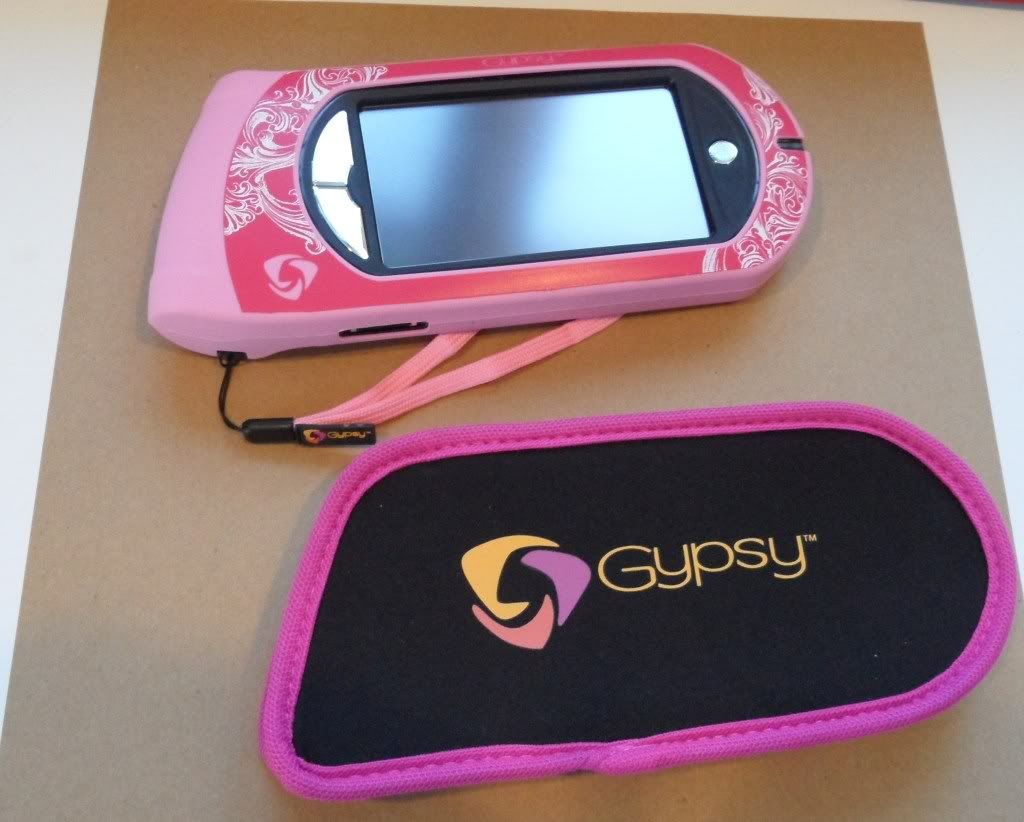
Having decided to add the Cricut Expression to my repertoire of  tools, I was looking for a design tool to help me to weld words and images.  The Cricut cartridges are great but are limited to the sayings that are included on the one cart that you are using and you can't really mix pictures or put all the words together.  I looked at the Design Studio software and then stumbled upon the Gypsy.  I read a few blogs, watched some Youtube videos and knew this would suit me best. 


I then found a great price for a bundle online at Oh My Crafts - the gypsy unit, the car charger (which will be great for those frequent trips to the summer cottage), 3 extra styluses, and a silicone sleeve.  Also, if it arrived before February 28th, I could get 5 extra cartridges plus the two included on the machine.  It was an offer that I could not refuse...even with shipping from Utah to Ottawa Canada and taxes, it was still an excellent deal and arrived within 10 business days - through USPS, Canada Customs and Canada Post!

When I received my Gypsy, I was somewhat concerned with the "synching" and dowloading of carts.  I had read about many different problems on the Cricut and Splitcoaststampers boards.  I followed the wonderful instuctions and within a few hours, I had everything loaded, my Cricut Expression software updated and was cutting my first project. 

I've been playing around with the Gypsy for about a week now, and it is sooo easy to use!