Showing posts with label Gallery. Show all posts

Sunday, March 24, 2013

Shabby/Vintage 50th Girlie Card


My BFF's sister will soon turn 50 and I was intent on making her a special card to mark this milestone.  I always enjoy trying new techniques and improving my skills.  To help me along, I participate in Wednesday's Sketch Challenge on the Cricut forum.  It is just for fun, no pressure challenge where a small group of ladies create card's based on sketches either made by the host or found from various blogs.  We always give proper attribution for these sketches.  There are no prizes - just the opportunity to share our creations, get some feedback and have some fun!  You can join in and learn more here.

I wanted to make a vintage/shabby card.  I have made a few cards in this style and have been inspired by the wonderful cards and creations of the Shabby Tea Room.  This week's challenge is "Anything Goes" and so I will submit this card - just for fun!

I based my card on sketch #1 by Milo Lilja.

 
Papers:  My Mind's Eye - Lost & Found Market Street
Ink: Tim Holtz Distressed Ink - Victorian Velvet and Peeled Paint
Handmade Crochet Flower and Paper Flowers
Cricut cuts for flourishes: 3 Birds on Parade, Cindy Loo, Elegant Cakes
and Martha Steward Seasonal Art Cake
Teresa Collins - brad
Miscellaneous ribbons, pearls and gems

I truly enjoyed making this card and building all of the different layers.  Hope you enjoyed it too and thanks for dropping by!


Sunday, March 10, 2013

Happy Birthday Dad!

It's my dear father's birthday on March 11th - he turns 77 years old.  Wishing him a wonderful day!

This card was part of the weekly challenge on the Cricut forum.  It is intended to be a sort of collage card.

Papers - Graphic 45, K&Company and DCWV
Images cut with the Cricut:  Banner, Party Hat, DAD
Stamped using Ranger Archival - black and sepia
Buttons from my stash - over 30 years old
Twine and brads


Thanks for dropping by!


Saturday, February 23, 2013

Playing with Metal - Tattered Flowers


Today was a good day to just play in my craftroom and try something new. I had been wanting to try making flowers from old soda pop cans.  Tim Holtz recent post is about using the Tattered flowers die and creating all kinds of flowers using different materials.  He used burlap and tissue paper glued on grunge paper for some great creations and is launching a contest.  It is worth checking out here

Here's my finished flower


I started off by cutting the top and bottom off of the soda can.  I used a combination of can opener and the Tim Holtz scissors.  Once done, I simply washed the metal, dried it off and began the project.  I used the Tattered Flowers die with my Big Shot and it cut so easily - only need to pass it through once.

I had LuminArte Silks Acrylic Glaze paints on hand but I wasn't sure if they would adhere to the metal.  I decided to apply a thin coat of gesso and then add my glaze paints.  I used a combination of teal, ginger peach and nutmeg.  Once the paint dried, I used the Tim Holtz textured fade embossing folder on the three flower petals.  Curled the flowers using a small wooden stick and hot glued them together.  A simple, off-white button for the centre.

Having been inspired by Tim Holtz and his spring flowers, i decided to make a Spring-themed card. 
Papers:  K&Company, DCWV
Doily - Tim Holtz die
Cricut - Frames and Birdcage
Pearl embellishment, brad, Stickles in silver and gold
 
The doily was also cut from the soda pop can and painted with Solar Gold and Nutmeg Luminarte glaze.  The frames were cut with my Cricut Expression using Elegant Edges cart and the the birdcage from Straight From the Nest cart.  I simply added a few pearl embellishments, stamped Spring using Ranger archival ink.  Added a bit of Stickles to the birdcage and "Spring"
 
I will be trying some new techniques soon!


Friday, January 25, 2013

Winter Woodland

We have been experiencing a deep freeze for the past few days with the temperature below -25 degrees Celsius and then add the windchill and it is just unbearable to be walking any distance outdoors. 

Given the cold temperatures, I was certainly inspired to make a Christmas card.  I am still playing along on the Cricut forum in RAQ's Challenges.  The particular sketch for my card was a Viva sketch.  I have also decided to submit this card in the Merry Monday Challenge.  A great challenge but unfortunately I have not played along in a while.  The theme this week is "For the Birds".

Card recipe
Papers Graphic 45 and Bazzil
Cricut Winter Woodland
Snowflake embossing folder
Miscellaneous stamp and brads
Ink - Distressed Black Soot, Vintage Photo, Sepia archival, Versa white chalk
 

Over the holidays, I watched a few videos and was reminded how inking edges can add depth and layering also helps to give dimension.  For the cardinal, I used the Winter Woodland Cricut cartridge but altered it as the bird did not have a wing nor feathery tail.  I inked the bird's chest and tail in distressed Black Soot ink.  The blue, cream and green frames are also from the Winter Woodland cart. The pine branches were made with the Martha Stewart punch and inked lightly with white chalk ink.  The sentiment is a stamp that I purchased at Michaels a few years ago and it is just hand cut.  I embossed the bottom layer using the Snowflake folder and inked with distress Vintage Photo ink. 

I am really happy with this creation!

I plan on being back soon and thanks for dropping by!


Sunday, October 21, 2012

Back to cardmaking!

I know I've been remiss in keeping my blog current however I changed careers over the summer and was busy with work and getting my certifications.  So all that is behind me now and I've been able to enjoy my little corner.  If you look under the "Craftroom" tab you'll see that my actual workspace is 11' x 3'.  Small but highly functional!

Here's a birthday card that I made for one of my daughter's friends. 

Papers - Authentique
Happy Birthday - Cricut Paper Lace 2
Crimper for rust border
Buttons from my MIL's stash (probably 50 years old)
 
 
And with Christmas a mere 9 weeks away, here is one of the latest Christmas cards that I made:
 
Papers - Recollections
Cricut - snowflakes, tag and words
MS branch punch
Embossed red tag with snowflake folder
Ribbon and brad
 
 
And lastly, to provide some inspiration for my American friends that are thinking about Thanksgiving, here is a place card that I made for a dinner party. 
 
Papers - unsure
Cricut for the green frame and leaves
Button from MIL's stash
Fiskars Corner Punch
Twine


Hope you're enjoying your weekend and I will be back more regularly now!


Friday, July 6, 2012

Vintage Christmas

I haven't posted in awhile due to the end of the school year activities and trip to the cottage.  It's been an amazingly hot week but I did find a bit of time to sneak away to my craft room.

I'm playing along with Jingle Belles Vintage Christmas challenge this week and here is my creation:

Papers - Graphic 45
Cricut - Joys of the Season for poinsettia 
Cricut - Accent Essentials for gold frame (welded with Gypsy)
Gold stickles, beads and gem embellishments
Vintage Photo distressed ink for edges and sentiment

I just love the Graphic 45 papers for this card.  The background paper is the classical "Night Before Christmas" story and such lovely images of old time Christmas.

Thanks for dropping by and hope you are enjoying the summer weather!


Challenge - Jingle Belles Have Yourself a Vintage Christmas JB-12-14

Tuesday, June 19, 2012

Thinking of You

Yesterday was a wonderful and special day as my great nephew was born.  I was busy finishing up cards for his parents and grandparents but I can't reveal them here just yet as they haven't received them.

A dear friend has been going through some challenging times so I made a card to cheer her up.  This card is part of the ISpySketches and Crazy4  challenges. For the Crazy4, we need to use 3 flowers, 3 papers, 3 buttons and 3 pearls.


Card recipe
Papers - Vintage Heartwarming Collection
Paper flowers
Silk ribbon, pearl embellishments and buttons
Stamp - Inkadinkado with Colorbox ink
Cricut Elegant Edges for all paper cuts except pink card base


Here is the sketch from ISSC

Thanks for dropping by and I would love to hear your comments!


Challenges
I Spy Sketches - ISSC20
Crazy4 Challenge

Thursday, June 14, 2012

Frosty Greetings

So I'm switching gears today from shabby tea to a hot cup of cocoa.  I'm playing along at Merry Monday and I've made another Christmas card - #37 for me, to be exact.

Card recipe
Papers - Fancy Pants Winterland and kraft
Cricut - Joys of the Season (mug) and Speaking of Winter (snowflake)
Crimper used on polka dot paper
Fiskars border punch
Distressed Broken China and Inkadinkado stamp

I've kept this card fairly simple. I used my crimper that's been sitting in the bottom of my drawer to give the allusion of the coffee cup sleeve.

Here's the wonderful sketch from Merry Monday

Thanks for dropping by and I always appreciate hearing from you!


Challenge: Always Playing with Paper - Merry Monday #24 Frosty Greetings

Tuesday, June 12, 2012

Tea time!

I decided to play along again at The Shabby Tea Room for this week's Shabby Beautiful challenge.  I will also be entering my card in the Mojo Monday challenge.  I've re-read the rules for TSTR as I don't think that my hot air balloon card for last week's Sweet Summer quite followed them as I didn't get any feedback.  I used the colours as an inspiration and not really the image.  Oops!  Oh well, the card turned out well and it's all part of the learning process.

So here is my card:

Card recipe
Papers Heartwarming Vintage Collection and Mind's Eye Lost and Found
Cricut - Everyday Paper dolls for teacups and Elegant cakes for aqua doily
Distressing and stitching on rounded rectangular pieces
Button, seam binding, pearls, flower, green ribbon and lace
Gold Stickles ont teacups

And the photo inspiration with the instructions to use aqua, pink, neutrals and flowers and make it shabby!

And lastly the sketch from Mojo Monday

Thanks for dropping by and I always appreciate hearing from you!


Challenges
The Shabby Tea Room Week 118 Shabby Beautiful

Sunday, June 10, 2012

Butterfly Girl

Happy Sunday everyone!  I hope you have wonderful plans to relax today.  I'm able to do as I please as unfortunately all of the members of my family are working today.  I was up bright and early at 4:55 am and so I had plenty of time to enjoy my coffee and make this card.


I had started some of it yesterday by stamping the middle part as I wanted to experiment with watercolouring using distressed ink.  I watched a few videos on Youtube but unfortunately I didn't bookmark them so I can't share the link with you.  It's a very simple technique that simply involves applying distress ink to an acrylic block then either use a waterfillable brush or paintbrush dipped in water.  I did the latter as I hand everything on hand.

Then today my inspiration for the Butterfly Girl was a stamp from Sam Poole at Creative Studios.  She has a wonderful set called Artful ladies and Sam has produced so many amazing cards.  Here's a link to the stamps and from there you can browse her blog.   I made my butterfly girl with the Cricut Expression using the Rock Princess cartridge.  I altered the image using the Gypsy to do away with the microphone and have two symetrical arms.

I then chose some soft papers from the Heatwarming Vintage Collection and Webster's pages.  Finally added a piece of ric rac and then a flower that I had recently made out of ribbon.

Enjoy your day and I would love to hear your comments!

Wednesday, June 6, 2012

Birthday Hot Air Balloon

It's midweek and the sun is shining after several days of rain!  I'm taking part in the Shabby Tea Room Sweet Summer Challenge and what better way with a hot air balloon ride!  For colours we needed to use Aqua or Teal, pink and brown.  Look closely at the pink doily and you'll find some yummy cupcakes!

Card recipe
Papers - DCWV Sweet Treats and My Mind's Eye Lost & Found
Tim Holtz doily and Cricut Elegant Edges
Inkadinkado stamp
Silk ribbon, seam binding, lace
Brads, gemstones, beads, pearls and feather

This particular card was a labour of love as I started off by box pleating the ribbon to make the flowers.  It's a little bit time consuming but you get such wonderful results.  I used the Tim Holtz doily die and the Cricut Elegant Edges for the frames of the hot air balloon.  I inked the hot air balloon stamp with Walnut Distress and Broken China.  The bow was made with seam binding from my MIL's stash - pretty old stuff but so pretty for this card!  I made the stick pin with a few pearls and beads and thought the feather worked well.  I added a vintage button with a bit of lace trim.   A few aqua gemstones to finish it off.

This card is for a special person who is sure to love and treasure it!

Here is the photo inspiration for this card:


Have a great day and thanks for dropping by!  I would love to hear your comments!

Monday, June 4, 2012

Just A Note...

It's Monday and I get to ease into the work week.  I worked on this card last night and finished it this morning.  For the sketch, I'm playing along with the I Spy Sketches Challenge #18 and the elements are part of the Repeat Impressions Designer Choice Challenge 523 where we need to have a Stamped Image, Embossing, and Diecut or Punch.


Card recipe
Papers - My Mind's Eye Lost & Found Market Street, K&Company Que Sera Sera
Stamped Flowers - Inkadinkado Flashy Floral, Just A Note
Tim Holtz butterfly embossing folder and distressed folder for watering can
Tim Holtz distressed ink Victorian Violet and Black Soot
Spellbinders Petite Scallop circle and Circle punch
Cricut Stretch Your Imagination for watering can
Versafine black ink and acid free markers
Gems and pearl embellishments, buttons from stash and embroidery floss


This is the first time that I coloured an image.  I wanted to give it a try before I look into purchasing some Copics.    I can see how much fun it would be so it's time for me to look into tutorials on Copics.  If you have any suggestions, please leave me a comment!

Here is the sketch from I Spy Sketches, I made my design on the landscape.

Thanks for dropping by and I would love to hear your feedback on this card!


Challenges:
I Spy Sketches -  ISSC18
Repeat Impressions DCC523

Sunday, June 3, 2012

Adestes Fideles - Classic Christmas song

I'm joining in again on the Jingle Belles challenge and this week we need to incorporate Christmas music.  I've also decided to play along with CardPatterns and use their sketch for my card.


There are so many wonderful songs that it was hard to choose the right one.  I picked Adestes Fideles, one of my all-time favourites, and printed off the music sheet on cream cardstock.  I then cut it with the Tim Holtz doily die.  I used my Cricut and cut the angel from the Christmas cartridge.  This was after doing a Nativity scene that I just didn't like.  Sometimes we have an idea and we visualize it but it doesn't always turn out on paper.  Luckily, like most of you, my papers were all on sale so I'm only wasting pennies.

I then tried to create the rectangle piece from the sketch and as I was looking through my paper stacks, I found the "Peace, Love, Joy" from Simple Stories.  So with the card almost complete, I stumbled upon the perfect background from the DCWV Christmas stack.  I added a few pearls, gem stones and ribbon and voilà my card was complete.  It did take a few hours from start to finish but it was a nice way to spend a few hours on a rainy Sunday.

Here is the sketch that I followed from CardPatterns

Thanks so much for dropping by and I always appreciate your comments!

Saturday, June 2, 2012

Love is in the Air

Now that it is the month of June, we are heading into the season of weddings and anniversaries.  I made this anniversary card for a family member or dear friend, just haven't decided who will receive it.


Card recipe
Papers - Fancy Pants Bella, DCWV, Recollections for base
Circle - Spellbinders Petite Circle scallops
Punches for corner and tag "love"
Fabric -  flower, blue border with rhinestones and lace

The colours and fabric were chosen as part of this week's challenge Color Me Pretty at the Shabby Tea Room and inspired with this photo


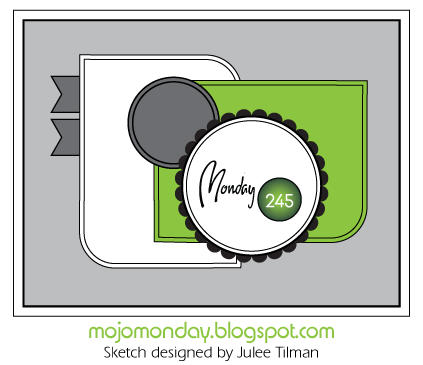
The sketch design is from Mojo Monday with a bit of a twist/my interpretation.


Thanks again for dropping by and I always appreciate your feedback and comments!

Enjoy the weekend!


Challenges: 
Shabby Tea Room Color Me Pretty
Mojo Monday #243

A day at the beach

It's still Spring here but I made this card for my SIL who lives in Italy and loves to take her children to the beach.  I made it as part of this week's RAQ Challenge on the Cricut forum and also to submit to My Sheri Crafts Summer Challenge

Card recipe
Papers - DCWV Songbird, Bazzill, clear acetate
Sew Easy for the piercing for the stitching
Cricut A Child's Year, Elegant Edges, Stretch Your Imagination
Embellishments: Brads, buttons, pearl and photo corner
Versafine ink for "Just Saying Hello"

I started the design with a port hole and then just chose the elements from my Cricut cartridges.  It's the first time that I've used the Sew Easy that I bought over a year ago.  It's not the "easiest" tool to use on heavy cardstock but it does add a nice touch!

Enjoy your day and thanks for dropping by!


Friday, May 25, 2012

Christmas Gift Card Holders

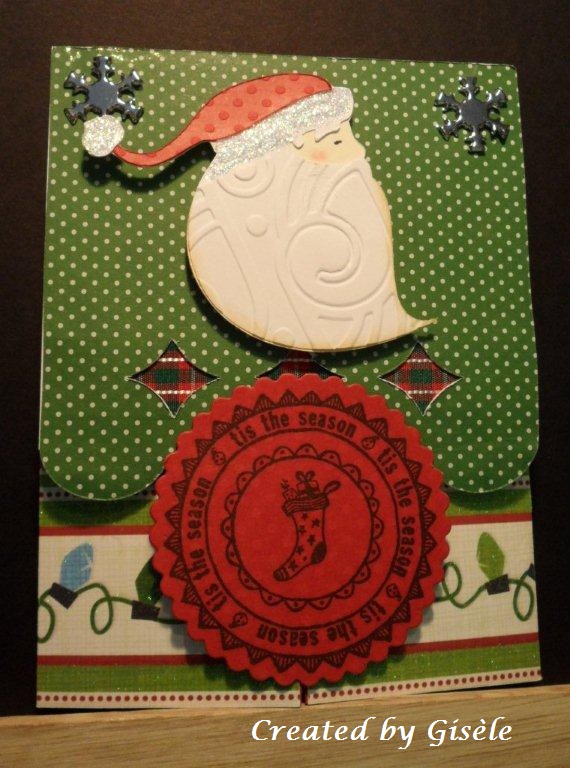
I'm playing along in the Jingle Belles challenge this week and we need to make a gift card holder.  I have a few to show you and I'm really pleased with how they turned out!

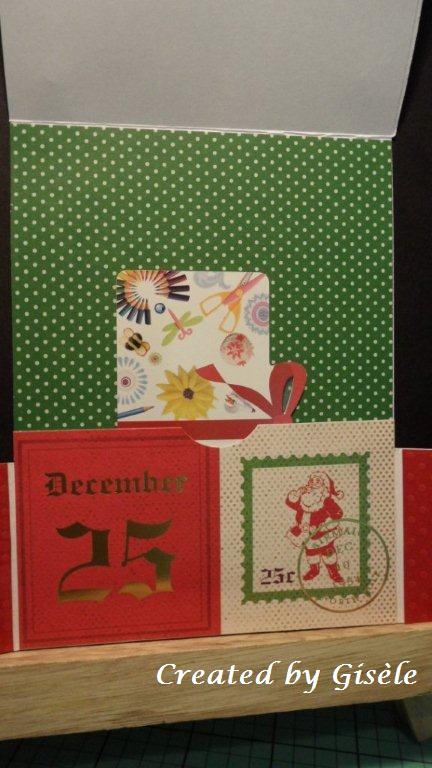
I made a dutch fold card for the first time and it is perfect to hold a gift card.   Here is the link to a tutorial on this type of card at Splitcoaststampers  

Card recipe:
Papers - DCWV Christmas Combo Stack and scraps
Santa - Cricut Joys of the Season
Tis the season stamp - unknown
Spellbinders Petite Scalloped Circle
Snowflake brads, Stickles, Tartan ribbon

For the next gift card holder I used something that we all have in our house, a toilet paper roll. I flattened it with my Big Shot and then covered it with Christmas papers from Simple Stories. 


I created a tag for the card insert. I added a button, clear snowflake embellishment, brad, ribbon and hand-sewed a blanket stitch around the edge of the gift card holder.  I'll simply use a glue dot to hold the gift card in place on the tag.

Card holder insert and tag


Front View                                                                    Back View


Hope this inspires you to make a gift card holder, for any occasion!

Thanks for dropping by!


Challenge:  Jingle Belles

Wednesday, May 23, 2012

Spring in Bloom - Garden Party #115

The weather has been amazing for the past week!  It is hotter than usual yet we have had some rain and as such the garden is coming into full bloom.  I enjoyed an extra long weekend and have finally enjoyed a bit of time in my craftroom. 

This card is part of the Shabby Tea Room Garden Party challenge.  The sketch design was an older MojoMonday sketch.

Card recipe:
Green strips - K&Company Que Sera Sera
Centre frame with lily - gcd Studios Antiquities
Butterfly - K&Company TC Blossomwood
Plaid tag - Lost & Found Portobello Road
Doily - Tim Holtz with Black Soot distress ink
Flower - ribbon hand-stitched
"just a note" stamped with Ranger permanent ink on silk ribbon
Grommet, gem flower and gem stones - unknown

For this challenge, we were asked to use these colours for inspiration and add a dimensional flower.


I hope the weather is nice your way and thanks for dropping by!


Challenge Shabby Tea Room