Sunday, April 24, 2011

Easter Parade - Final Cards

Happy Easter!  Hope you're enjoying this time with your family and friends. 

First off, I'm showing a couple of mailboxes that I decorated from my two children.  They're too old for an Easter hunt but still enjoy receiving some candy and chocolate.  The mailboxes were purchased at Walmart and I simply decorated them with paper, personalized them and made a few cut-outs for the flag.


Here is the card that I made for my dear husband.  It is a fold card that stands up on its own.  I simply designed the rabbit using the Gypsy and welded a rectangle for the base. I used some "fun flock" in light green for the accent, cut the grass from A Child's Year cartridge and tied a ribbon at the neck.


The next shape card was for my parents and I simply welded the shape together.  I cut out the relevant layers in DCWV glitter and shimmer paper. I printed the Happy Easter on vellum and attached it with a purple button brad.  


The next card was given to my dear daughter.  I had tried the Smooch Spritz for the background layer, cut the chickadee and musical notes from a Stretch Your Imagination cartridge and added some ribbon for embellishment.  The card base was an ivory embossed paper from a stock that I had on hand.


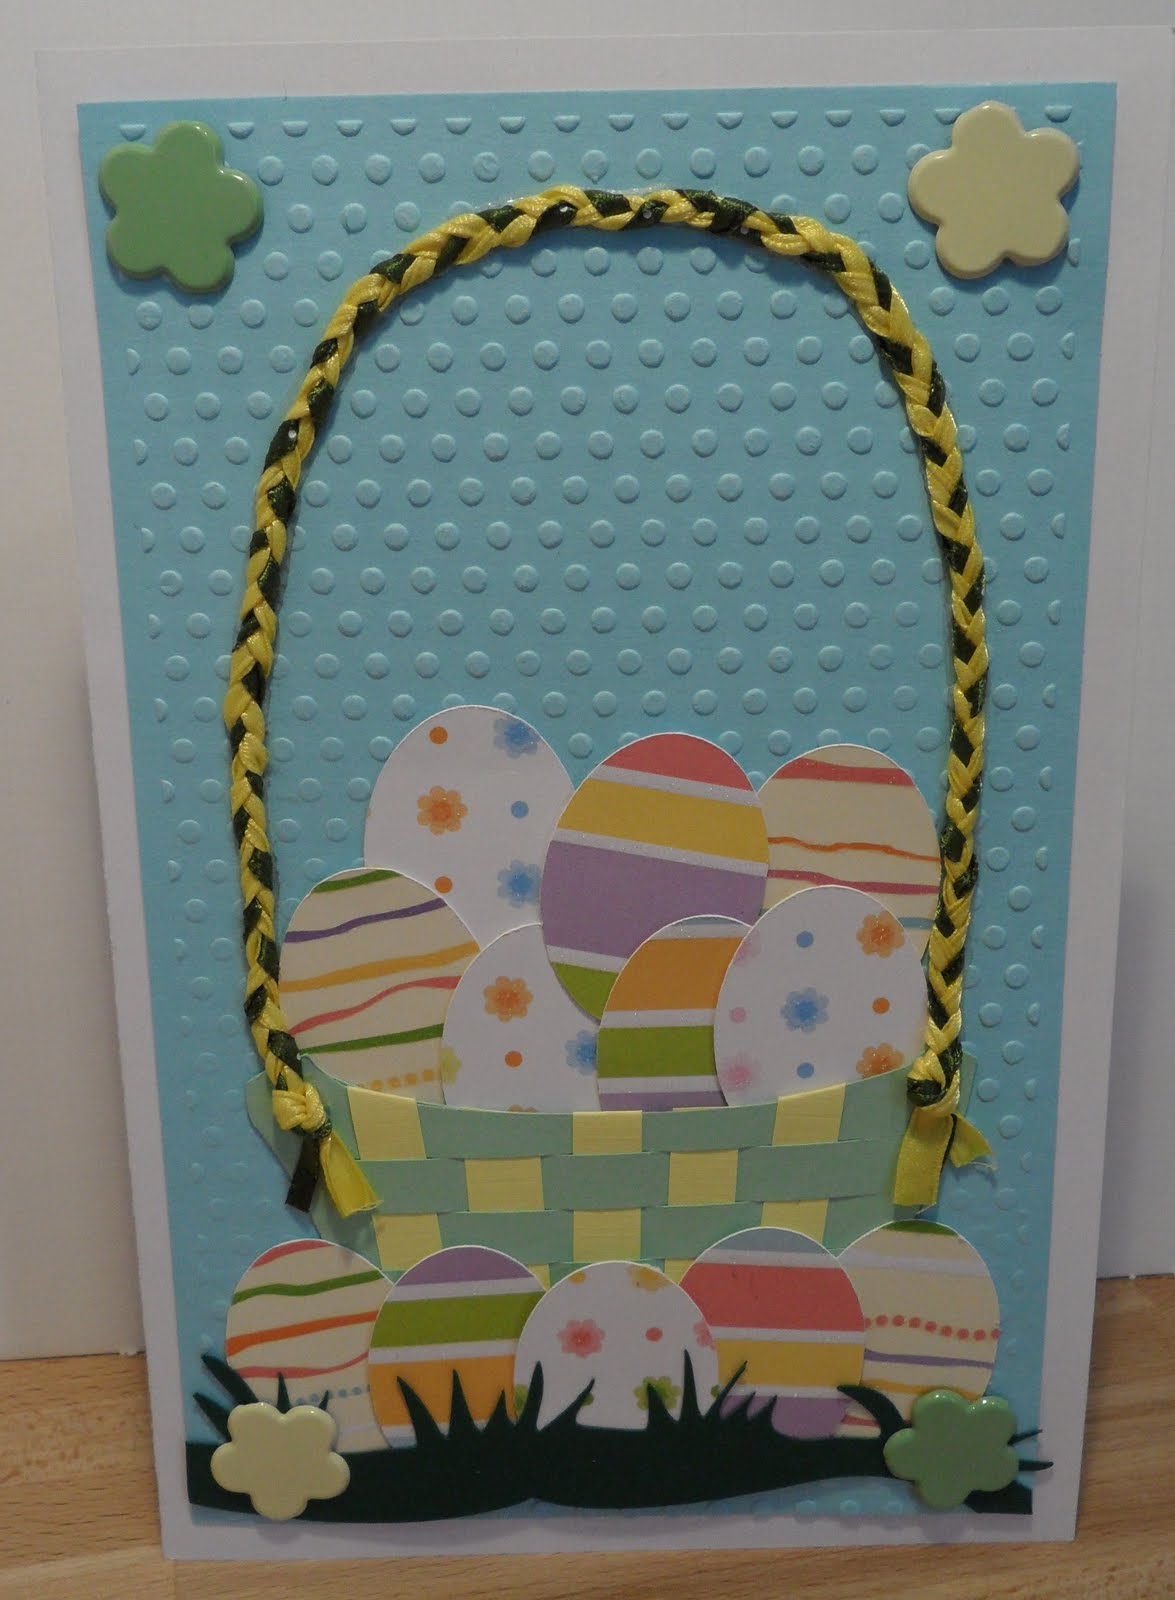
Finally, here is the card for my son.  I used the Stretch your Imagination cartridge for the rabbit and egg shapes using different colours of paper and outlining the entire shape in a silver DCWV shimmer paper. 


I also suggest that you l look at the previous post and let me know which is your favorite Easter card.   


Friday, April 22, 2011

Easter Parade of Cards

Easter will soon be here and I can show you the first round of cards that have been mailed and received by family and friends.  They'll be a few more cards but I can't show those until Easter Sunday. 

The first card is for my dear BFF, her husband and three girls.  I chose to make 3 bunnies to represent each girl.  I used "fun flock" for the first time and it was easy and fun! I chose a green paper from DCWV shimmer stack as the card base.  I layered the words "Joyeuses Paques" with a DCWV glitter stack, added some ribbon, grommets and then a sentiment inside the card with a decorated egg.


The next card is for my brother and his family.  For this card, I braided some ribbon, ran the layer of blue paper through my Big Shot using the Cuttlebug polka dot folder, added a few flower brads and then made the basket, grass and eggs with my Cricut.  I weaved paper strips through the basket, just as we did in primary school :)!


The next card is for my eldest sister and her family.  I chose a purple paper from DCWV shimmer stack as the card base.  I layered the rabbit with purple paper and DCWV glitter stack.  I added some ribbon, a corsage pin that I embellished with beads and then carried some of the same paper inside for the sentiment which is printed on vellum.


And finally the last card is for my other sister.  I used again DCWV shimmer paper and cut the shape from the Wild Card cartridge.  All shapes were cut from a cricut cartridge.  I stamped the word Easter on the front using Tim Holtz distressed ink and added a few daisies and yellow ribbon for embellishment.


Check back in on Sunday to see the final Easter cards and then maybe you can tell me which one you like best.

Thursday, April 14, 2011

Sympathy Card

I debated (with myself) about creating a sympathy card for a friend who's father passed away.  I decided to go ahead and make my first sympathy card.


I used Ivory cardstock for the base, layered the front with Sei Oasis paper with rounded corner punch from Fiskars and added a small blue flower for embellishment.  I ribbon punched the green Oasis cardstock and also used the Cuttlebug polka dot embossing folder, then ran a brown polka dot ribbon through the holes.  I added a brown base and green frame for the saying on the front that I printed on marbled white vellum and added a few brads.  This frame was raised using pop-dots.  For inside the card, I made a small border of the same Sei Oasis paper, printed the saying on the same marbled white vellum and added the small flowers with branch sticker.  The border helps to bring the theme inside the card and hides the two small glue dots that are used to hold the vellum in place.


Wednesday, April 13, 2011

Happy Birthday my dear son!

My son turned 17 yesterday and he wanted me to make him a card with a distressed look.  He had seen me watching a video back in November 2010 and asked if I could do that for him for his birthday in April 2011.  I thought I would have lots of time to practice and test long before April 12th, but of course there were so many other holidays and demands on my time that I never really practised.  So this week, I made a mixture of strong coffee, took out my Tim Holtz walnut stain distressed ink and my rubber stamp that looks like old writing and began my card project for my dear son.  Here are the results of my efforts:


He was born at 3:04 pm on April 12th 1994 hence the time on the clock.  You see a picture of him on the left the day he was born and then one from yesterday morning on April 12th 2011.  Bonne Fête mon cher Robin!

Sunday, April 10, 2011

Latest card creations

Wow! Nearly three weeks since my last update...that's what happens when work gets in the way of our hobbies!  My crunch time in my consulting business is often March 31st as I have a number of government contracts requiring that all work be completed by that date.  So it is always a mad, mad rush to get everything in order and then the first week of April is recovery time.  So back to my card hobby....

I'm working on a number of Easter cards which I will get to show you really soon as well as my dear son's card whose birthday is on April 12th. 

I've continued to explore the Paper Dolls cartridge and made this card for our dear friend:


The card is a trifold.  On the front of the card, I embossed and inked the first layer then added some ribbon. I then welded the "Bonne Fete Paul" and layered the wording on a frame for effect.  The letters were also outlined.  For the third fold of the card, I made a golfer with the cart, green and flag.  The top portion includes a coupon and balls and tees to finish the embellishment.  It was a very personalized card and I'm pleased with how it turned out.

The next card was again a request from my daughter, this time for a synchronized swimming friend that helped to organized the team activities for the season.


I was trying to capture a number of things in this card with the synchro swimmers, the bake sale and of course the main person.  I stamped the face with a Peachy Keen Princess Face and added blush with chalk.  I added glitter to the cupcakes and stamped a quick "thanks" near the water splashes.  The finished card when opened is 12 x 12 as I needed to include enough room inside the card for the 16 girls to sign.  I then made this huge envelope for the card.  All in all, this creation turned out very well too.