Sunday, February 27, 2011

The Big Kick - Big Shot

As many of you know, I had been debating about the Big Shot or the Big Shot Pro.  I finally decided on the Big Shot as I will mainly be using the tool for embossing elements of the cards that I'm making.  I don't foresee in the near future that I will want the XXL dies that can only be used in the Big Shot Pro. 

I looked around for the best deal and settled on Michaels with a 50% off coupon.  No shipping charges so it made the most sense.  Michaels sells the Big Kick in periwinkle, which suits me fine.  Here it is all set up in my craft room. 


I bought a few folders - 6 or so so that should work for me until Christmas :)!


Tags

I was quite busy with work this week but I still managed to find time to make a few tags.  I just started using my new Big Kick (a great deal at Michaels) and I'm finding it really easy to add dimension to the cards using the few embossing folders that I have.

Here's a look at the first, very simple tag that I made:


I have a number of projects underway given the special people in my life who will be celebrating birthdays in March.  I will reveal them in the coming weeks! 


Monday, February 21, 2011

Cricut Community Board

This week's shout-out is to the Cricut Community board and specifically to the Gypsy Tech Qs and As section.    It can save you so much time and you can learn so many helpful tips and techniques.   


So if you have a Gypsy, I highly recommend this site.

The Gypsy

Having decided to add the Cricut Expression to my repertoire of  tools, I was looking for a design tool to help me to weld words and images.  The Cricut cartridges are great but are limited to the sayings that are included on the one cart that you are using and you can't really mix pictures or put all the words together.  I looked at the Design Studio software and then stumbled upon the Gypsy.  I read a few blogs, watched some Youtube videos and knew this would suit me best. 


I then found a great price for a bundle online at Oh My Crafts - the gypsy unit, the car charger (which will be great for those frequent trips to the summer cottage), 3 extra styluses, and a silicone sleeve.  Also, if it arrived before February 28th, I could get 5 extra cartridges plus the two included on the machine.  It was an offer that I could not refuse...even with shipping from Utah to Ottawa Canada and taxes, it was still an excellent deal and arrived within 10 business days - through USPS, Canada Customs and Canada Post!

When I received my Gypsy, I was somewhat concerned with the "synching" and dowloading of carts.  I had read about many different problems on the Cricut and Splitcoaststampers boards.  I followed the wonderful instuctions and within a few hours, I had everything loaded, my Cricut Expression software updated and was cutting my first project. 

I've been playing around with the Gypsy for about a week now, and it is sooo easy to use! 

"Thank You" cards

When I visited my brother recently, I wanted to add a card to the "host/hostess" gift we were giving.  Using the "Stretch Your Imagination" cartridge, I easily made this card. 


I also handmade the pin embellishment by using a corsage pin and a few beads.  A nice touch!

This weekend we were invited to dinner at friends and we were bringing wine and flowers (spring tulips actually - good bye winter I hope).  I needed a card and tag for the wine bottle.  I turned to my Cricut Expression and in a matter of minutes I produced everything - the card, the tag and the envelope!
 

I added a bit of ribbon, glitter and a brad button to the flower and stamped the inside. 


Valentine Cards

Now that Valentine's Day is well behind us, I can actually post some of my cards that I recently made.

The first one is a stitched card following an Erica Fortgens pattern.  I added a few clear beads on the larger hearts and ribbon for embellishment. 


Then I made a double fold pocket card to hold a small card and tag. 


I've been experimenting with stamping and distressing.  The "be mine" and the tag are my very first results.  I'm sure my technique will improve over time.


As this card was for my dear husband, I embellished the envelope using ribbon and some letter stickers that I received in my Christmas stocking.


Saturday, February 5, 2011

What the heck is a Sew Easy Piercer?

My dear aunt introduced me to the Sew Easy Piercer at Christmas time.    It's a simple little tool that pierces holes in your paper quickly to then enable you to do all kinds of stitches. Being a passionate stitcher, I just needed to get one. It's been in high demand since last August and I was able to get mine online from Ohmycrafts.

Here's a look at the tool and the different interchangeable heads.


These are the different stitches that are produced:

I'll be using this tool in my next few projects.

Splitcoaststampers

My first shout-out is to the Splitcoaststampers forum.  I found them through a Google search back in November and quickly signed up.  I haven't become an active participant in the discussions yet but will do so very soon! 

So thank you crafters around the world, you've really taught me a lot about products and techniques relating to card making, stamping, making bags and boxes, where are the best online deals or stores and even blogging!


Big Shot or Big Shot Pro

Well I've made several purchases in the last few months to support/enable my paper crafting.  One tool that I do not have is an embossing/die cutting machine.  I've looked at several and seem to have narrowed it down to the Sizzix models.  BUT I'm not sure which model I prefer -  the heavy duty Big Shot Pro or the Big Shot. 


What do you have or what are your thoughts?


Showcasing my work area

In late November 2010, I decided that it was time to dedicate an area in the house for my paper crafting projects.  The intent was to do some paper embroidery tags for Christmas gifts but it expanded quickly into bags, boxes and wrapping for the presents. 

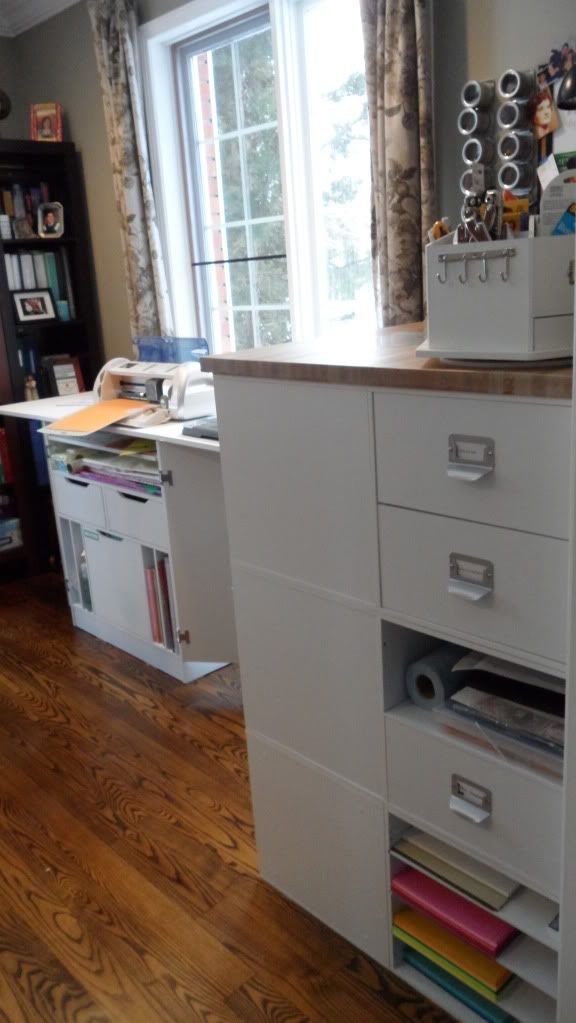
I have a great office in my home for my consulting business which is located on the main level and is bright and airy.  Taking a small part of the office (abour 9 1/2 feet by 4 feet), my talented husband, created this lovely workspace.


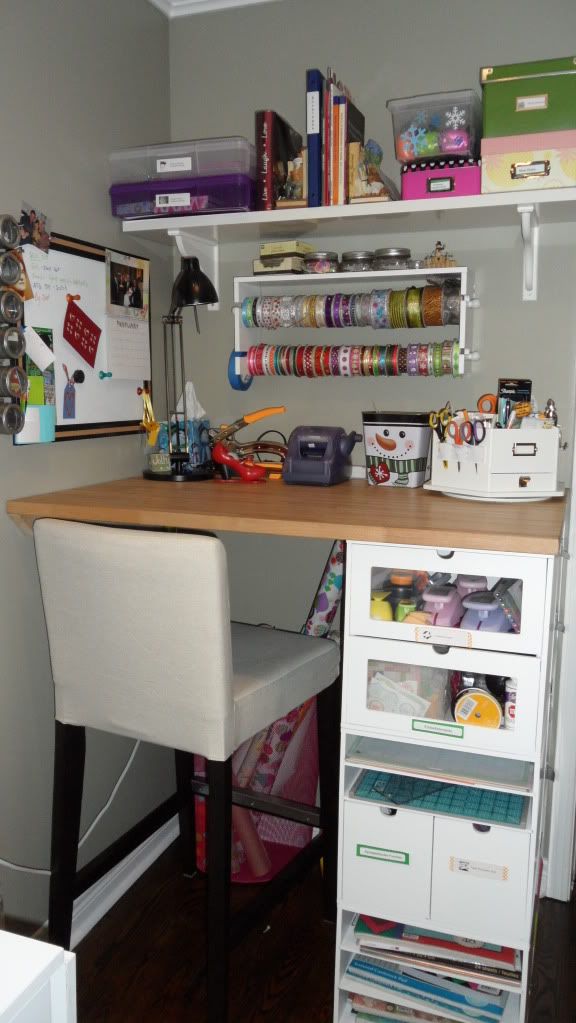
By choosing to work at bar height, I managed to get another 2 Jetmax cubes which is phenomenal for all of my storage needs.  BTW = all of the Jetmax units were purchased at Michaels at 50% off, the butcher block countertop was found in the "as is" section of Ikea and the odds and ends were found at Canadian Tire, Walmart or other harware stores.  I'm a savvy shopper and try to stretch my dollars as far as possible.


I keep moving things around in the cubes as I add some new tools and supplies to make my projects, but that is the beauty and flexibility of these shelving units.  I added this workarea in January for cutting and assembling. 


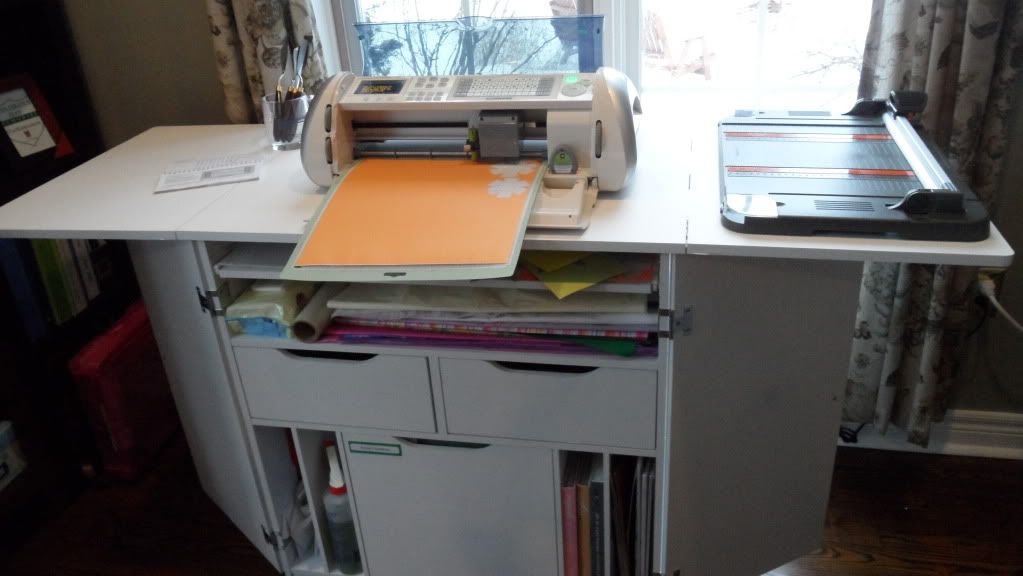
FYI for the crafters - the dust cover was made following the pattern by Custom Crops.  I completed the project using French seams so everything is nice and tidy and added binding for the bottom hem.  This was a Fabricland deal costing less than $7 and I have material leftover for a pillow. 

The table unit expands fully and is highly functional for the Cricut Expression (more on that later as it is one of my newest toys...I mean tools :).


Hope this gives you some ideas for your craft area!


Christening card for my great-nephew

Here is a card that I stitched following the pattern in "Basics of Embroidery on Paper" by Erica Fortgens.  I added a few brads and bow for embellishment. 


Friday, February 4, 2011

Launching of Blog


I'm busy working away on the blog template and design.  I should have it up and running by the end of the weekend. Stay tuned!